xTuple is in my opinion incredibly well designed; the code is clean and the architecture ahderent to a standardized structure. All this makes working with xTuple software quite a breeze.
I wanted to integrate
JSCommunicator into the web-based xTuple version. JSCommunicator is a SIP communication tool, so my first step was to create an extension for the SIP account data. Luckily for me, the xTuple development team published an awesome
tutorial for writing an xTuple extension.
xTuple cleverly uses model based business objects for the various features available. This makes customizing xTuple very straightforward. I used the tutorial mentioned above for writing my extension, but soon noticed my goals were a little different. A SIP account has 3 data fields, these being the SIP URI, the account password and an optional display name. xTuple currently has a business object in the core code for a User Account and it would make a lot more sense to simply add my 3 fields to this existing business object rather than create another business object. The tutorial very clearly shows how to extend a business object with another business object, but not how to extend a business object with only new fields (not a whole new object).
Now maybe I m just a whole lot slower than most people, but I had a ridiculously had time figuring this out. Mind you, this is because I m slow, because the xTuple documentation and code is understandable and as self-explanatory as it gets. I think it just takes a bit to get used to. Either way, I thought this just might be useful to others so here is how I went about it.
Setup
First you ll have to set up your xTuple development environment and fork the xtuple and xtuple-extesions repositories as shown in
this handy tutorial. A footnote I d like to add is please verify that your version of Vagrant (and anything else you install) is the one listed in the tutorial. I think I spent like two entire days or more on a wild goose (bug) chase trying to set up my environment when the cause of all the errors was that I somehow installed an older version of Vagrant - 1.5.4 instead of 1.6.3. Please don t make the same mistake I did. Actually if for some reason you get the following error when you try using node:
<<ERROR 2014-07-10T23:52:46.948Z>> Unrecoverable exception. Cannot call method 'extend' of undefined
    at /home/vagrant/dev/xtuple/lib/backbone-x/source/model.js:37:39
    at Object.<anonymous> (/home/vagrant/dev/xtuple/lib/backbone-x/source/model.js:1364:3)
    ...
chances are, you have the wrong version. That s what happened to me. The Vagrant Virtual Development Environment automatically installs and configures everything you need, it s ready to go. So if you find yourself installing and updating and apt-gets and etc, you probably did something wrong.
Coding
So by now we should have the Vagrant Virtual Development Environment set up and the web app up and running and accessible at localhost:8443. So far so good.
Disclaimer: You will note that much of this is similar - or rather, nearly identical - to xTuple s tutorial but there are some small but important differences and a few observations I think might be useful. Other Disclaimer: I m describing how I did it, which may or may not be up to snuff . Works for me though.
Schema
First let s make a schema for the table we will create with the new custom fields. Be sure to create the correct directory stucture, aka /path/to/xtuple-extensions/source/<YOUR EXTENSION NAME>/database/source or in my case /path/to/xtuple-extensions/source/sip_account/database/source, and create the file create_sa_schema.sql, sa is the name of my schema. This file will contain the following lines:
do $$
  /* Only create the schema if it hasn't been created already */
  var res, sql = "select schema_name from information_schema.schemata where schema_name = 'sa'",
  res = plv8.execute(sql);
  if (!res.length)
    sql = "create schema sa; grant all on schema sa to group xtrole;"
    plv8.execute(sql);

$$ language plv8;
Of course, feel free to replace sa with your schema name of choice. All the code described here can be found in my xtuple-extensions fork, on the
sip_ext branch.
Table
We ll create a table containing your custom fields and a link to an existing table - the table for the existing business object you want to extend. If you re wondering why make a whole new table for a few extra fields, here s a good
explanation, the case in question is adding fields to the Contact business object.
You need to first figure out what table you want to link to. This might not be uber easy. I think the best way to go about it is to look at the ORMs. The xTuple ORMs are a JSON mapping between the SQL tables and the object-oriented world above the database, they re .json files found at path/to/xtuple/node_modules/xtuple/enyo-client/database/orm/models for the core business objects and at path/to/xtuplenyo-client/extensions/source/<EXTENSION NAME>/database/orm/models for exension business objects. I ll give two examples. If you look at
contact.json you will see that the Contact business object refers to the table cntct . Look for the type : Contact on the
line above, so we know it s the Contact business object. In my case, I wanted to extend the UserAccount and UserAccountRelation business objects, so check out
user_account.json. The table listed for
UserAccount is xt.usrinfo and the table listed for
UserAccountRelation is xt.usrlite. A closer look at the sql files for these tables (
usrinfo.sql and
usrlite.sql) revealed that usrinfo is in fact a view and usrlite is A light weight table of user information used to avoid punishingly heavy queries on the public usr view . I chose to refer to xt.usrlite - that or I received error messages when trying the other table names.
Now I ll make the file /path/to/xtuple-extensions/source/sip_account/database/source/usrlitesip.sql, to create a table with my custom fields plus the link to the urslite table. Don t quote me on this, but I m under the impression that this is the norm for naming the sql file joining tables: the name of the table you are referring to ( usrlite in this case) and your extension s name.
Content of usrlitesip.sql:
select xt.create_table('usrlitesip', 'sa');
select xt.add_column('usrlitesip','usrlitesip_id', 'serial', 'primary key', 'sa');
select xt.add_column('usrlitesip','usrlitesip_usr_username', 'text', 'references xt.usrlite (usr_username)', 'sa');
select xt.add_column('usrlitesip','usrlitesip_uri', 'text', '', 'sa');
select xt.add_column('usrlitesip','usrlitesip_name', 'text', '', 'sa');
select xt.add_column('usrlitesip','usrlitesip_password', 'text', '', 'sa');
comment on table sa.usrlitesip is 'Joins User with SIP account';
Breaking it down, line 1 creates the table named usrlitesip (no duh), line 2 is for the primary key (self-explanatory). You can then add any columns you like, just be sure to add one that references the table you want to link to. I checked
usrlite.sql and saw the primary key is usr_username, be sure to use the primary key of the table you are referencing.
You can check what you made by executing the .sql files like so:
$ cd /path/to/xtuple-extensions/source/sip_account/database/source
$ psql -U admin -d dev -f create_sa_schema.sql
$ psql -U admin -d dev -f usrlitesip.sql
After which you will see the table with the columns you created if you enter:
$ psql -U admin -d dev -c "select * from sa.usrlitesip;"
Now create the file /path/to/xtuple-extensions/source/sip_account/database/source/manifest.js to put the files together and in the right order. It should contain:
  "name": "sip_account",
  "version": "1.4.1",
  "comment": "Sip Account extension",
  "loadOrder": 999,
  "dependencies": ["crm"],
  "databaseScripts": [
    "create_sa_schema.sql",
    "usrlitesip.sql",
    "register.sql"
  ]
I think the name has to be the same you named your extension directory as in /path/to/xtuple-extensions/source/<YOUR EXTENSION NAME>. I think the comment can be anything you like and you want your loadOrder to be high so it s the last thing installed (as it s an add on.) So far we are doing exactly what s instructed in the xTuple tutorial. It s repetitive, but I think you can never have too many examples to compare to. In databaseScripts you will list the two .sql files you just created for the schema and the table, plus another file to be made in the same directory named register.sql.
I m not sure why you have to make the register.sql or even if you indeed have to. If you leave the file empty, there will be a build error, so put a ; in the register.sql or remove the line register.sql from manifest.js as I think for now we are good without it.
Now let s update the database with our new extension:
$ cd /path/to/xtuple
$ ./scripts/build_app.js -d dev -e ../xtuple-extensions/source/sip_account
$ psql -U admin -d dev -c "select * from xt.ext;"
That last command should display a table with a list of extensions; the ones already in xtuple like crm and billing and some others plus your new extension, in this case sip_account . When you run build_app.js you ll probably see a message along the lines of <Extension name> has no client code, not building client code and that s fine because yeah, we haven t worked on the client code yet.
ORM
Here s where things start getting different. So ORMs link your object to an SQL table. But we DON T want to make a
new business object, we want to extend an
existing business object, so the ORM we will make will be a little different than the xTuple tutorial.
Steve Hackbarth kindly explained this new business object/existing business object ORM concept
here.
First we ll create the directory /path/to/xtuple-extensions/source/sip_account/database/orm/ext, according to xTuple convention. ORMs for new business objects would be put in /path/to/xtuple-extensions/source/sip_account/database/orm/models. Now we ll create the .json file /path/to/xtuple-extensions/source/sip_account/database/orm/ext/user_account.jscon for our ORM. Once again, don t quote me on this, but I think the name of the file should be the name of the business object you are extending, as is done in the
turorial example extending the Contact object. In our case, UserAccount is defined in user_account.json and that s what I named my extension ORM too.
Here s what you should place in it:
 1 [
 2
 3     "context": "sip_account",
 4     "nameSpace": "XM",
 5     "type": "UserAccount",
 6     "table": "sa.usrlitesip",
 7     "isExtension": true,
 8     "isChild": false,
 9     "comment": "Extended by Sip",
10     "relations": [
11
12         "column": "usrlitesip_usr_username",
13         "inverse": "username"
14
15     ],
16     "properties": [
17
18         "name": "uri",
19         "attr":
20           "type": "String",
21           "column": "usrlitesip_uri",
22           "isNaturalKey": true
23
24        ,
25
26         "name": "displayName",
27         "attr":
28           "type": "String",
29           "column": "usrlitesip_name"
30
31        ,
32
33         "name": "sipPassword",
34         "attr":
35           "type": "String",
36           "column": "usrlitesip_password"
37
38
39     ],
40     "isSystem": true
41    ,
42
43     "context": "sip_account",
44     "nameSpace": "XM",
45     "type": "UserAccountRelation",
46     "table": "sa.usrlitesip",
47     "isExtension": true,
48     "isChild": false,
49     "comment": "Extended by Sip",
50     "relations": [
51
52         "column": "usrlitesip_usr_username",
53         "inverse": "username"
54
55     ],
56     "properties": [
57
58         "name": "uri",
59         "attr":
60           "type": "String",
61           "column": "usrlitesip_uri",
62           "isNaturalKey": true
63
64        ,
65
66         "name": "displayName",
67         "attr":
68           "type": "String",
69           "column": "usrlitesip_name"
70
71        ,
72
73         "name": "sipPassword",
74         "attr":
75           "type": "String",
76           "column": "usrlitesip_password"
77
78
79     ],
80     "isSystem": true
81
82 ]
Note the context is my extension name, because the context + nameSpace + type combo has to be unique. We already have a UserAccount and UserAccountRelation object in the XM namespace in the xtuple context in the original
user_account.json, now we will have a UserAccount and UserAccountRelation object in the XM namespace in the sip_account conext. What else is important? Note that isExtension is true on lines 7 and 47 and the relations item contains the column of the foreign key we referenced.
This is something you might want to verify: column (lines 12 and 52) is the name of the attribute on
your table. When we made a reference to the primary key usr_usrname from the xt.usrlite table we named that column usrlitesip_usr_usrname. But the inverse is the attribute name associated with the original sql column in the original ORM. Did I lose you? I had a lot of trouble with this silly thing. In the original ORM that created a new UserAccount business object, the primary key attribute is named username , as can be seen
here. That is what should be used for the inverse value. Not the sql column name (usr_username) but the object attribute name (username). I m emphasizing this because I made that mistake and if I can spare you the pain I will.
If we rebuild our extension everything should come along nicely, but you won t see any changes just yet in the web app because we haven t created the client code.
Client
Create the directory /path/to/xtuple-extensions/source/sip_account/client which is where we ll keep all the client code.
Extend Workspace View
I want the fields I added to show up on the form to create a new User Account, so I need to extend the view for the User Account workspace. I ll start by creating a directory /path/to/xtuple-extensions/source/sip_account/client/views and in it creating a file named workspace.js containing this code:
XT.extensions.sip_account.initWorkspace = function ()
	var extensions = [
  	 kind: "onyx.GroupboxHeader", container: "mainGroup", content: "_sipAccount".loc() ,
  	 kind: "XV.InputWidget", container: "mainGroup", attr: "uri"  ,
  	 kind: "XV.InputWidget", container: "mainGroup", attr: "displayName"  ,
  	 kind: "XV.InputWidget", container: "mainGroup", type:"password", attr: "sipPassword"
	];
	XV.appendExtension("XV.UserAccountWorkspace", extensions);
 ;
So I m initializing my workspace and creating an array of items to add (append) to view XV.UserAccountWorkspace. The first item is this onyx.GroupboxHeader which is a pretty divider for my new form fields, the kind you find in the web app at Setup > User Accounts, like Overview . I have no idea what other options there are for container other than mainGroup , so let s stick to that. I ll explain content: _sipAccount .loc() in a bit. Next I created three input fields of the XV.InputWidget kind. This also confused me a bit as there are different kinds of input to be used, like dropdowns and checkboxes. The only advice I can give is snoop around the webapp, find an input you like and look up the corresponding workspace.js file to see what was used.
What we just did is (should be) enough for the new fields to show up on the User Account form. But before we see things change, we have to package the client. Create the file /path/to/xtuple-extensions/source/sip_account/client/views/package.js. This file is needed to package groups of files and indicates the order the files should be loaded (for more on that, see
this). For now, all the file will contain is:
enyo.depends(
"workspace.js"
);
You also need to package the views directory containing workspace.js, so create the file Create the file /path/to/xtuple-extensions/source/sip_account/client/package.js and in it show that the directory views and its contents must be part of the higher level package:
I like to think of it as a box full of smaller boxes.
This will sound terrible, but apparently you also need to create the file /path/to/xtuple-extensions/source/sip_account/client/core.js containing this line:
XT.extensions.icecream = ;
I don t know why. As soon as I find out I ll be sure to inform you.
As we ve added a file to the client directory, be sure to update /path/to/xtuple-extensions/source/sip_account/client/package.js so it included the new file:
enyo.depends(
"core.js",
"views"
);
Translations
Remember _sipAccount .loc() in our workspace.js file? xTuple has great internationalization support and it s easy to use. Just create the directory and file /path/to/xtuple-extensions/source/sip_account/client/en/strings.js and in it put key-value pairs for labels and their translation, like this:
(function ()
  "use strict";
  var lang = XT.stringsFor("en_US",
    "_sipAccount": "Sip Account",
    "_uri": "Sip URI",
    "_displayName": "Display Name",
    "_sipPassword": "Password"
   );
  if (typeof exports !== 'undefined')
    exports.language = lang;

 ());
So far I included all the labels I used in my Sip Account form. If you write the wrong label (key) or forget to include a corresponding key-value pair in strings.js, xTuple will simply name your lable _lableName , underscore and all.
Now build your extension and start up the server:
$ cd /path/to/xtuple
$ ./scripts/build_app.js -d dev -e ../xtuple-extensions/source/sip_account
$ node node-datasource/main.js
If the server is already running, just stop it and restart it to reflect your changes.
Now if you go to Setup > User Accounts and click the + button, you should see a nice little addition to the form with a Sip Account divider and three new fields. Nice, eh?
Extend Parameters
Currently you can search your User Accounts list using any of the User Account fields. It would be nice to be able to search with the Sip account fields we added as well. To do that, let s create the directory /path/to/xtuple-extensions/source/sip_account/client/widgets and there create the file parameter.js to extend XV.UserAccountListParameters. One again, you ll have to look this up. In the
xTuple code you ll find the application s parameter.js in
/path/to/xtuple/enyo-client/application/source/widgets. Search for the business object you are extending (for example, XV.UserAccount) and look for some combination of the business object name and Parameters . If there s more than one, try different ones. Not a very refined method, but it worked for me.
Here s the content of our parameter.js:
XT.extensions.sip_account.initParameterWidget = function ()
  var extensions = [
     kind: "onyx.GroupboxHeader", content: "_sipAccount".loc() ,
     name: "uri", label: "_uri".loc(), attr: "uri", defaultKind: "XV.InputWidget" ,
     name: "displayName", label: "_displayName".loc(), attr: "displayName", defaultKind: "XV.InputWidget"
  ];
  XV.appendExtension("XV.UserAccountListParameters", extensions);
 ;
Node that I didn t include a search field for the password attribute for obvious reasons. Now once again, we package this new code addition by creating a /path/to/xtuple-extensions/source/sip_account/client/widgets/package.js file:
enyo.depends(
"parameter.js"
);
We also have to update /path/to/xtuple-extensions/source/sip_account/client/package.js:
enyo.depends(
"core.js",
"widgets"
"views"
);
Rebuild the extension (and restart the server) and go to Setup > User Accounts. Press the magnifying glass button on the upper left side of the screen and you ll see many options for filtering the User Accounts, among them the SIP Uri and Display Name.
Extend List View
You might want your new fields to show up on the list of User Accounts. There s a bit of an issue here because unlike what we did in workspace.js and parameter.js, we can t append new things to the list of UserAccounts with the funciton XV.appendExtension(args). First I tried overwriting the original UserAccountList, which works but it s far from ideal as this could result in a loss of data from the core implementation. After some
discussion with the xTuple dev community, now there s a better alternative:
Create the file /path/to/xtuple-extensions/source/sip_account/client/views/list.js and add the following:
1 var oldUserAccountListCreate = XV.UserAccountList.prototype.create;
2
3 XV.UserAccountList.prototype.create = function ()
4   oldUserAccountListCreate.apply(this, arguments);
5   this.createComponent(
6    kind: "XV.ListColumn", container: this.$.listItem, components: [
7         kind: "XV.ListAttr", attr: "uri"
8    ] )
9  ;
To understand what I m doing, check out the XV.UserAccountList implementation in
/path/to/xtuple/enyo-client/application/source/views/list.js the entire highlighted part. What we are doing is extending XV.UserAccountList through prototype-chaining ; this is how
inheritance works with Enyo. In line 1 we create a prototype and in line 4 we inherit the features including original components array which the list is based on. We then create an additional component immitating the setup shown in XV.UserAccountList: An XV.ListColumn containing an XV.ListAttr, which should be placed in the XV.ListItem components array as is done with the existing columns (refer to
implementation). Components can or should (?) have
names which are used to access said components. You d refer to a specific component by the this.$.componentName hash. The components in XV.UserAccountList don t have names, so Enyo automatically names them (apparently) based on the
kind name, for example something of the kind
ListItem is named
listItem. I found this at random after a lot of trial and error and it s not a bullet proof solution. Can be bettered.
It s strange because if you encapsulate that code with
XT.extensions.sip_account.initList = function ()
 //Code here
 ;
as is done with parameter.js and workspace.js (and in the xTuple tutorial you are supposed to do that with a new business object), it doesn t work. I have no idea why. This might be wrong or against xTuple coding norms; I will find out and update this post ASAP. But it
does work this way. * shrugs *
That said, as we ve created the list.js file, we need to ad it to our package by editing /path/to/xtuple-extensions/source/sip_account/client/views/package.js:
enyo.depends(
"list.js",
"workspace.js"
);
That s all. Rebuild the app and restart your server and when you select Setup > User Accounts in the web app you should see the Sip URI displayed on the User Accounts that have the Sip Account data. Add a new User Account to try this out.
 This isn't actually answering the question, but it's close. It's also horrible, so whoever adopts
Enrico's script should also
completely rewrite this or burn it along with the stack of pizza boxes and the grand piano.
Input:
This isn't actually answering the question, but it's close. It's also horrible, so whoever adopts
Enrico's script should also
completely rewrite this or burn it along with the stack of pizza boxes and the grand piano.
Input:
 I spent last night in San Francisco on my way from Tucson to Seoul.
This morning as I headed to the airport, I caught the end of a shouted
conversation between a down-and-out and a couple of middle school-aged
girls, who ran away back to the Asian Art museum as the conversation
ended. A security guard told the man that he needed him to go away.
The wealth divide so visible here just isn t something you really see
around Tucson.
I m working on a new module for Propellor that s complicated enough
that I need to think carefully about the Haskell in order to write
produce a flexible and maintainable module. I ve only been doing an
hour or so of work on it per day, but the past few days I wake up each
day with an idea for restructuring yesterday s code. These ideas
aren t anything new to me: I think I m just dredging up the
understanding of Haskell I developed last year when I was studying it
more actively. Hopefully this summer I can learn some new things
about Haskell.
Riding on the Bay Area Rapid Transit (BART) feels like stepping back
in time to the years of Microsoft s ascendency, before we had a tech
world dominated by Google and Facebook: the platform announcements are
in a computerised voice that sounds like it was developed in the
nineties. They ll eventually replace the old trains apparently some
new ones are coming in 2017 so I feel privileged to have been able
to ride the older ones. I feel the same about the Tube in London.
I really appreciate old but supremely reliable and effective public
transport. It reminds me of the Debian toolchain: a bit creaky, but
maintained over a sufficiently long period that it serves everyone a
lot better than newer offerings, which tend to be produced with
ulterior corporate motives.
I spent last night in San Francisco on my way from Tucson to Seoul.
This morning as I headed to the airport, I caught the end of a shouted
conversation between a down-and-out and a couple of middle school-aged
girls, who ran away back to the Asian Art museum as the conversation
ended. A security guard told the man that he needed him to go away.
The wealth divide so visible here just isn t something you really see
around Tucson.
I m working on a new module for Propellor that s complicated enough
that I need to think carefully about the Haskell in order to write
produce a flexible and maintainable module. I ve only been doing an
hour or so of work on it per day, but the past few days I wake up each
day with an idea for restructuring yesterday s code. These ideas
aren t anything new to me: I think I m just dredging up the
understanding of Haskell I developed last year when I was studying it
more actively. Hopefully this summer I can learn some new things
about Haskell.
Riding on the Bay Area Rapid Transit (BART) feels like stepping back
in time to the years of Microsoft s ascendency, before we had a tech
world dominated by Google and Facebook: the platform announcements are
in a computerised voice that sounds like it was developed in the
nineties. They ll eventually replace the old trains apparently some
new ones are coming in 2017 so I feel privileged to have been able
to ride the older ones. I feel the same about the Tube in London.
I really appreciate old but supremely reliable and effective public
transport. It reminds me of the Debian toolchain: a bit creaky, but
maintained over a sufficiently long period that it serves everyone a
lot better than newer offerings, which tend to be produced with
ulterior corporate motives.
 Explaining G del s theorems to students is a pain. Period. How can those poor creatures crank their mind around a Completeness and an Incompleteness Proof I understand that. But then, there are brave souls using G del s theorems to explain the world of demons to writers, in particular to answer the question:
 Very impressive.
Found at
Very impressive.
Found at  Concerning the binaries we do expect a few further changes, but hopefully nothing drastic. The most invasive change on the tlmgr side is that cryptographic signatures are now verified to guarantee authenticity of the packages downloaded, but this is rather irrelevant for Debian users (though I will look into how that works in user mode).
Other than that, many packages have been updated or added since the last Debian packages, here is the unified list:
Concerning the binaries we do expect a few further changes, but hopefully nothing drastic. The most invasive change on the tlmgr side is that cryptographic signatures are now verified to guarantee authenticity of the packages downloaded, but this is rather irrelevant for Debian users (though I will look into how that works in user mode).
Other than that, many packages have been updated or added since the last Debian packages, here is the unified list:


 Here is my monthly update covering a large part of what I have been doing in the free software world (
 Updated packages
apnum, appendix, archaeologie, babel, babel-french, babel-greek, babel-hungarian, bangorcsthesis, beamer-verona, bhcexam, bibarts, bidi, bxjscls, chemfig, commado, comprehensive, context, cslatex, csplain, ctanify, doclicense, dvips, ejpecp, exsheets, fbb, fibeamer, fithesis, fontools, francais-bst, gitinfo2, glossaries, gnuplottex, greek-fontenc, hyph-utf8, indextools, ksp-thesis, l3build, l3experimental, l3kernel, l3packages, latexcourse-rug, lollipop, lstbayes, lualibs, luaotfload, luatexja, luatexko, luatodonotes, make4ht, mcf2graph, media9, mex, mfirstuc, mhchem, mptopdf, nameauth, nevelok, newtx, nicetext, nucleardata, ocgx2, pageslts, petri-nets, phonrule, pkuthss, powerdot, proofread, proposal, pst-labo, pst-solides3d, reledmac, sapthesis, serbian-lig, showlabels, t2, tcolorbox, tempora, testhyphens, tetex, tex4ebook, tex4ht, texlive-scripts, texsis, thuthesis, toptesi, tudscr, ucharcat, versonotes, xcharter, xepersian, xifthen, xindy, xint.
New packages
beamertheme-detlevcm, beamertheme-metropolis, beamertheme-phnompenh, beamer-verona, bitpattern, carbohydrates, delimseasy, drawmatrix, einfuehrung2, ellipse, ffslides, gitlog, greektonoi, ksp-thesis, longfbox, options, simpler-wick, unicode-data.
Enjoy.
Updated packages
apnum, appendix, archaeologie, babel, babel-french, babel-greek, babel-hungarian, bangorcsthesis, beamer-verona, bhcexam, bibarts, bidi, bxjscls, chemfig, commado, comprehensive, context, cslatex, csplain, ctanify, doclicense, dvips, ejpecp, exsheets, fbb, fibeamer, fithesis, fontools, francais-bst, gitinfo2, glossaries, gnuplottex, greek-fontenc, hyph-utf8, indextools, ksp-thesis, l3build, l3experimental, l3kernel, l3packages, latexcourse-rug, lollipop, lstbayes, lualibs, luaotfload, luatexja, luatexko, luatodonotes, make4ht, mcf2graph, media9, mex, mfirstuc, mhchem, mptopdf, nameauth, nevelok, newtx, nicetext, nucleardata, ocgx2, pageslts, petri-nets, phonrule, pkuthss, powerdot, proofread, proposal, pst-labo, pst-solides3d, reledmac, sapthesis, serbian-lig, showlabels, t2, tcolorbox, tempora, testhyphens, tetex, tex4ebook, tex4ht, texlive-scripts, texsis, thuthesis, toptesi, tudscr, ucharcat, versonotes, xcharter, xepersian, xifthen, xindy, xint.
New packages
beamertheme-detlevcm, beamertheme-metropolis, beamertheme-phnompenh, beamer-verona, bitpattern, carbohydrates, delimseasy, drawmatrix, einfuehrung2, ellipse, ffslides, gitlog, greektonoi, ksp-thesis, longfbox, options, simpler-wick, unicode-data.
Enjoy.
 Thanks to my employer I had opportunity to spent two days just working on my packages.
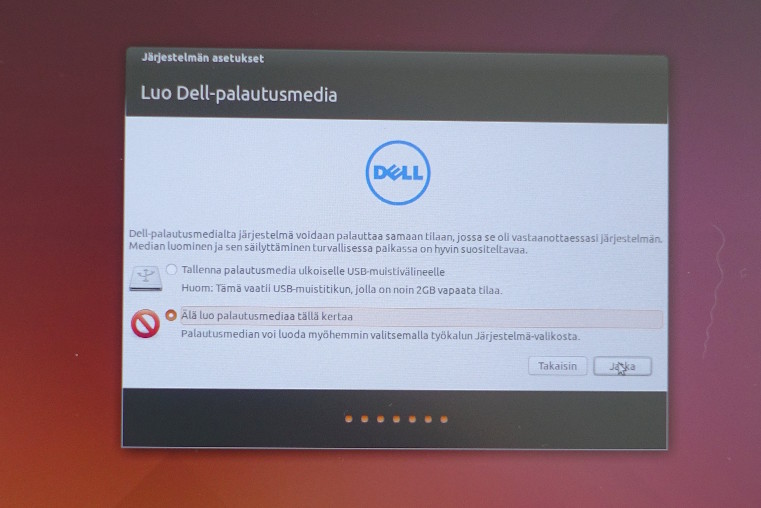
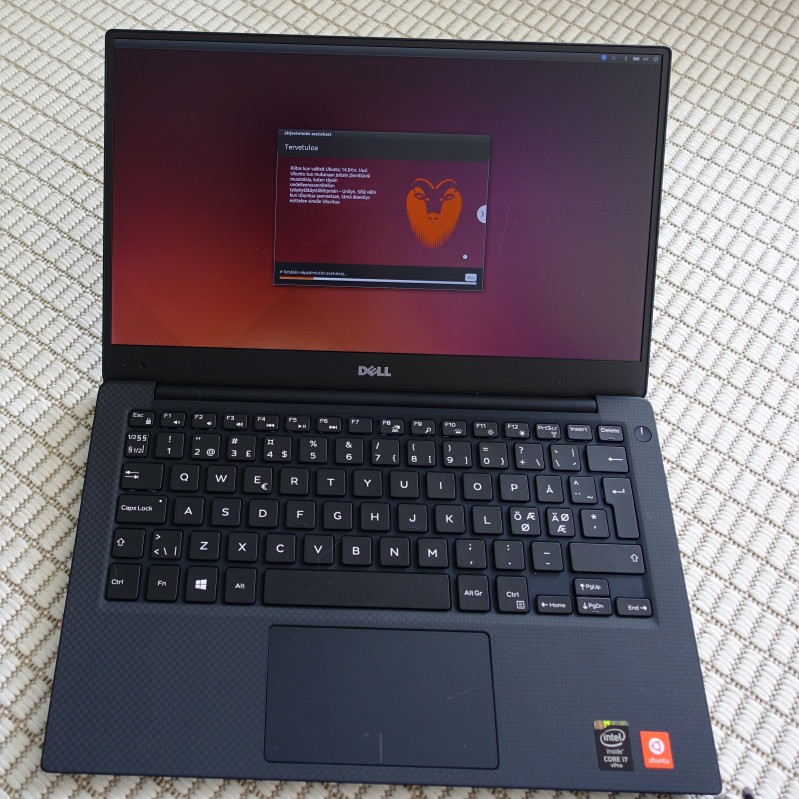
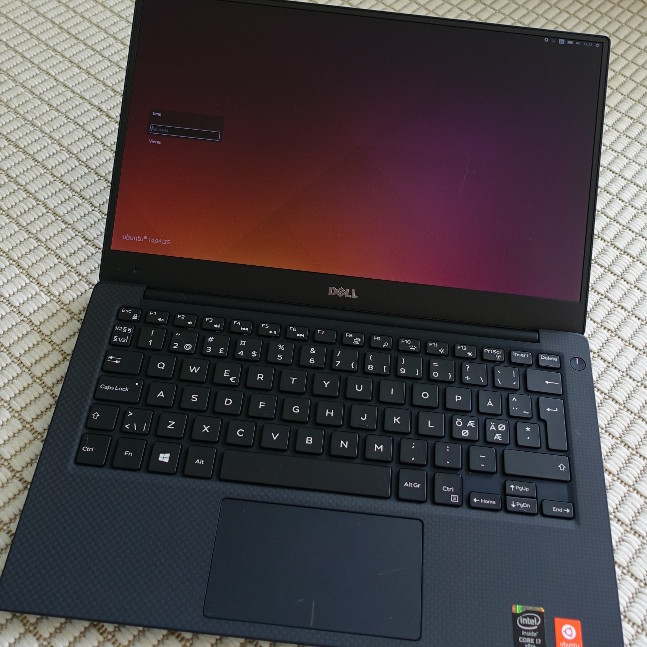
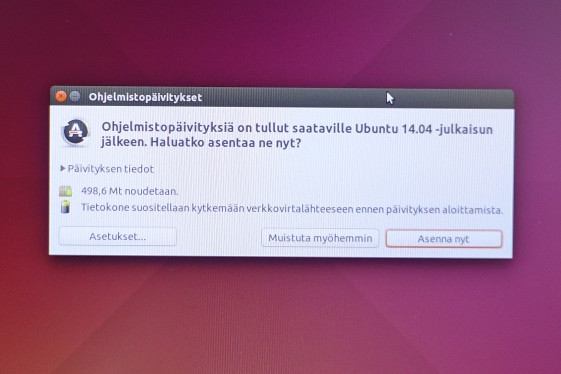
 I recently obtained the newest Dell's Ubuntu developer offering, XPS 13 (2015, model 9343). I opted in for FullHD non-touch display, mostly because of better battery life, the actual no need for higher resolution, and matte screen which is great outside. Touch would have been "nice-to-have", but in my work I don't really need it.


 Jo and I just got back from our massive holiday in Australia. We
had an awesome time overall, fitting in lots of stuff
in 4 weeks. Time for a quick write-up and some photos!
Jo and I just got back from our massive holiday in Australia. We
had an awesome time overall, fitting in lots of stuff
in 4 weeks. Time for a quick write-up and some photos!


 and gives a preview of the wide range of commercial opportunities that WebRTC is creating for software vendors to displace traditional telecommunications providers.
xTupleCon also gave me a great opportunity to see new features (like the
and gives a preview of the wide range of commercial opportunities that WebRTC is creating for software vendors to displace traditional telecommunications providers.
xTupleCon also gave me a great opportunity to see new features (like the 
 During October, I spent 10 hours on paid LTS work. I should have worked 4 hours more, but for various reasons this did not happen. Instead I ll spend 4 more hours in November.
During this time, I did the following:
During October, I spent 10 hours on paid LTS work. I should have worked 4 hours more, but for various reasons this did not happen. Instead I ll spend 4 more hours in November.
During this time, I did the following:
